Introduction to Application:
FileZilla – client is an open source cross-platform FTP, SFTP and FTPS file management tools that helps to transfer files with ease.
Download link: https://filezilla-project.org/download.php?type=client
Please follow the below steps in order to establish the connection with server and start using FileZilla – Client.
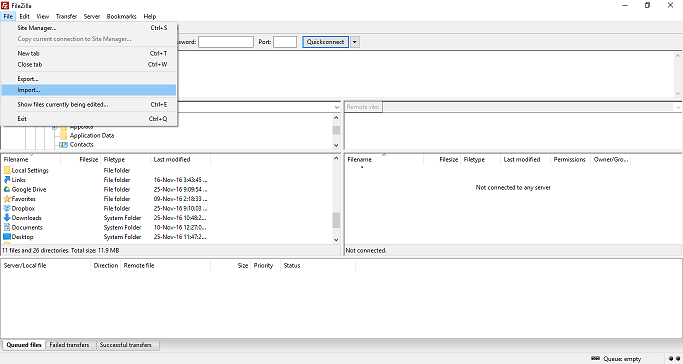
Step 1. Open/Run Filezilla application on your local machine. Click “File” on the top left menu in the application and select “Import” within the
dropdown menu.
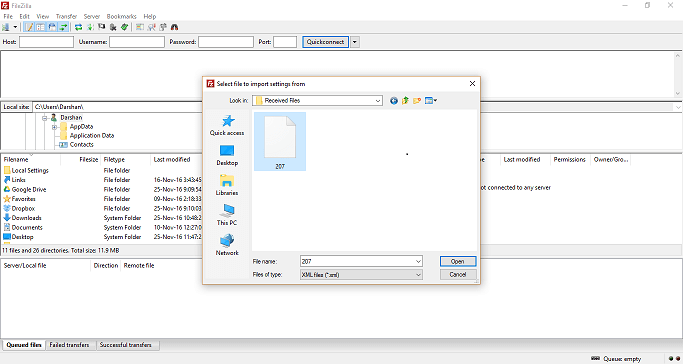
Step 2. Pop-up window will open upon the click to select the .XML file. Please navigate to .XML file that has been provided to you. Select the file and click “Open”.
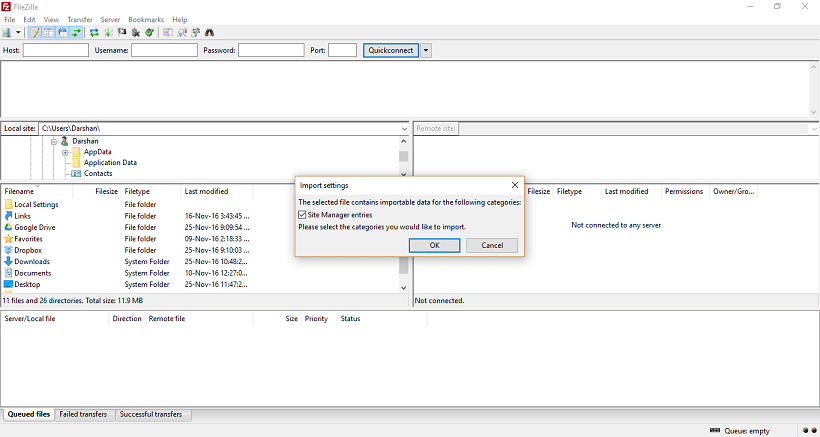
Step 3. Please keep the settings default as shown in the picture below and continue by clicking “OK”.
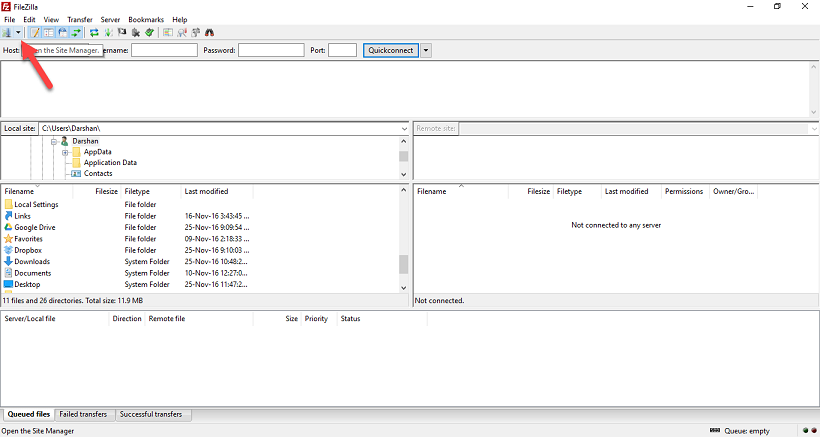
Step 4. Once the import is complete, click on the Drop arrow as shown in the figure to establish the connection with server.
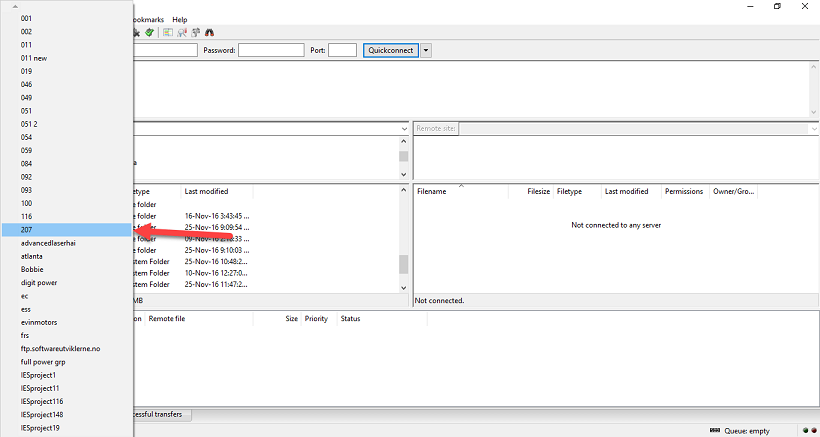
Step 5. Choose the file name you imported in previous step from the list items displayed.
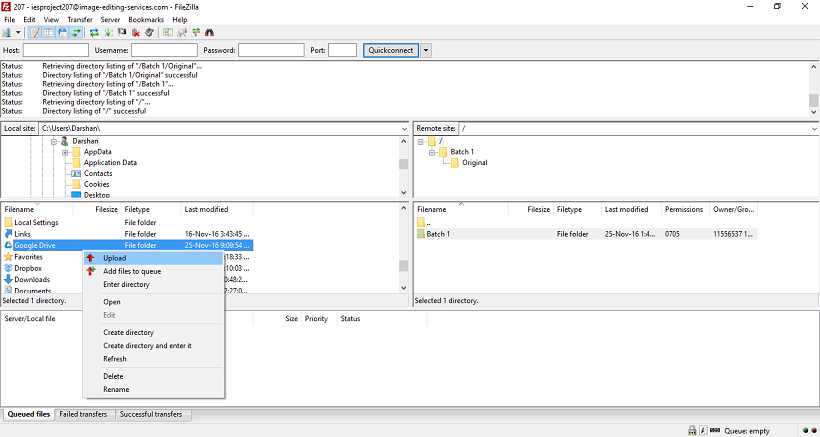
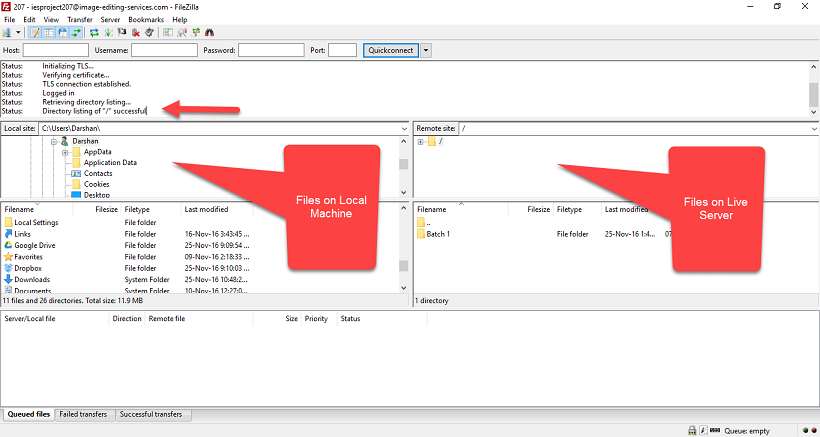
Step 6. You will be able to see “Directory listing of “/” successful” as shown in the below picture. On the left, you will be able to navigate within the local machine and on right you’ll be able to access the files on live server.
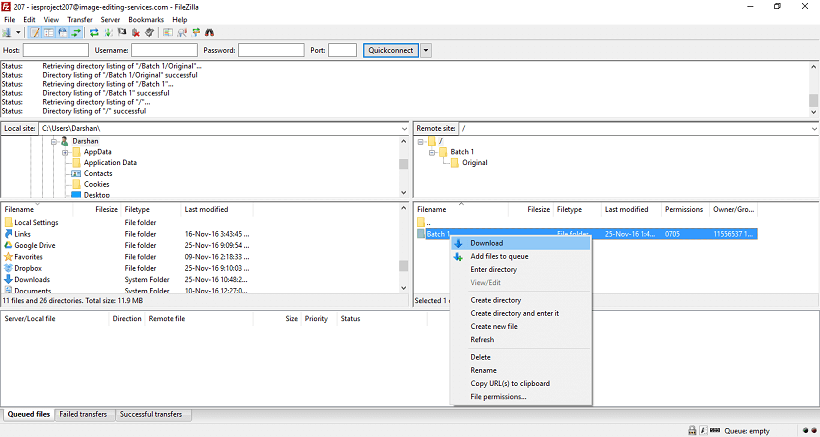
Step 7. You can download the files from live server to local machine by right clicking on files/folder and use Download option from Dropdown menu.
Step 8. Similarly, files and folder can be uploaded from local machine to live server by right clicking on them and choosing upload from the dropdown.